Photographing the aurora
The camera sees the aurora better than you do, which is half the fun and half the confusion. A phone held steady can catch a decent shot, and a camera on a tripod can do far more if you set it up before the sky starts moving. These are the settings that work near Fairbanks, plus what the cold does to your kit. The last sections cover the tours that take the pictures for you.
Why the camera sees more than your eyes
In the dark your eyes rely on cells that are sensitive to light but nearly blind to color. A faint aurora can look like a pale grey cloud to you, then turn up bright green on the back of a camera that gathered light for ten seconds. Strong displays show their color to the naked eye too, mostly green from oxygen, sometimes with a pink or purple lower edge from nitrogen.
This is not a trick. The camera records what is there, only more of it. So take test shots of any pale band low in the northern sky, since it may be aurora you barely noticed. It also means the screen is a poor judge of brightness at night, so check the histogram rather than trusting the glowing preview.
Phone photos that work
Recent phones do surprisingly well. Switch on night mode with the flash off, then hold the phone still for the few seconds the exposure takes. Hand-held shots smear. A small phone tripod fixes that, and so does resting the phone on a car roof or a backpack in the snow. Use the self-timer so that tapping the button does not shake the frame.
If your phone has a manual or pro mode, set an exposure of a few seconds yourself and fix the focus at infinity, which beats letting the phone guess in the dark. Stay on the widest lens rather than zooming, and put a tree line or a person at the bottom of the frame for scale.
Two habits save more pictures than any setting. Wear thin liner gloves so you can tap the screen without freezing your fingers, and keep the phone in an inner pocket between shots. Dressing for a night at −20 °F covers the rest of the layers.
Camera settings to start from
With a camera, take full control. Autofocus and auto exposure struggle in the dark, so set everything by hand before the lights build, while you can still see the dials.
| Setting | Start at | Why |
|---|---|---|
| Mode | Manual (M) | Auto modes hunt and guess in the dark |
| Lens | Your widest | A good display can fill half the sky |
| Aperture | As wide as it goes, such as f/2.8 | Lets in the most light per second |
| ISO | 1600–3200 | Lower on a bright, moonlit night |
| Shutter | 2–15 s | Short for fast curtains, long for a slow, faint arc |
| Focus | Manual, on a bright star | Or at infinity, confirmed on the zoomed-in screen |
| File | RAW | Leaves room to fix color and noise later |
The shutter speed is the setting you will change most. When the aurora is a slow, faint arc, 10–15 s gathers enough light. When it breaks into fast-moving curtains, drop to 2–5 s, or the folds blur into a green smear, and raise the ISO to make up the light. Turn off image stabilization on a tripod, and fix the white balance rather than leaving it on auto so a run of frames matches.
Focus is where most night shots fail. Switch the lens to manual focus and magnify a bright star on the live-view screen. Turn the ring until the star is a sharp point. Many lenses focus a little past the infinity mark, so trust the star over the marking. Then leave the ring alone. A strip of tape over it stops a mitten from nudging it later.
Tripods and headlamps on a crowded hilltop
Any exposure longer than about a second needs a tripod. A sturdy one beats a featherweight travel model in wind or deep snow, and pushing the legs well into the snow steadies it. If you would rather not fly with one, SkyChase at ~$335 rents tripods and its guides help with camera settings. Metal legs at −20 °F (−29 °C) bite bare skin, so handle them with gloves on.
Bring a headlamp with a red mode. Red light lets you see the dials without wrecking your night vision, and it is far less likely to spoil someone else's long exposure. On a busy hilltop, keep white beams and car headlights pointed away from the cameras, and ask before you walk in front of a row of tripods.
Cold batteries and a fogged lens
Camera batteries drain fast in the cold, and a full one can give up within an hour outside. Carry two or three spares in an inner pocket and swap them as they fade. A battery that seems dead often recovers once it warms up again.
The bigger risk comes at the end of the night. Bring a cold camera straight into a warm van and moisture condenses on it and inside the lens, then freezes the next time you step out. Before you get in, put the camera in a sealed plastic bag or a closed camera bag and let it warm slowly to room temperature. Take the memory card out first, so you can look at the night's photos while the camera warms. Never breathe on a cold lens to clean it, since the breath freezes on the glass.
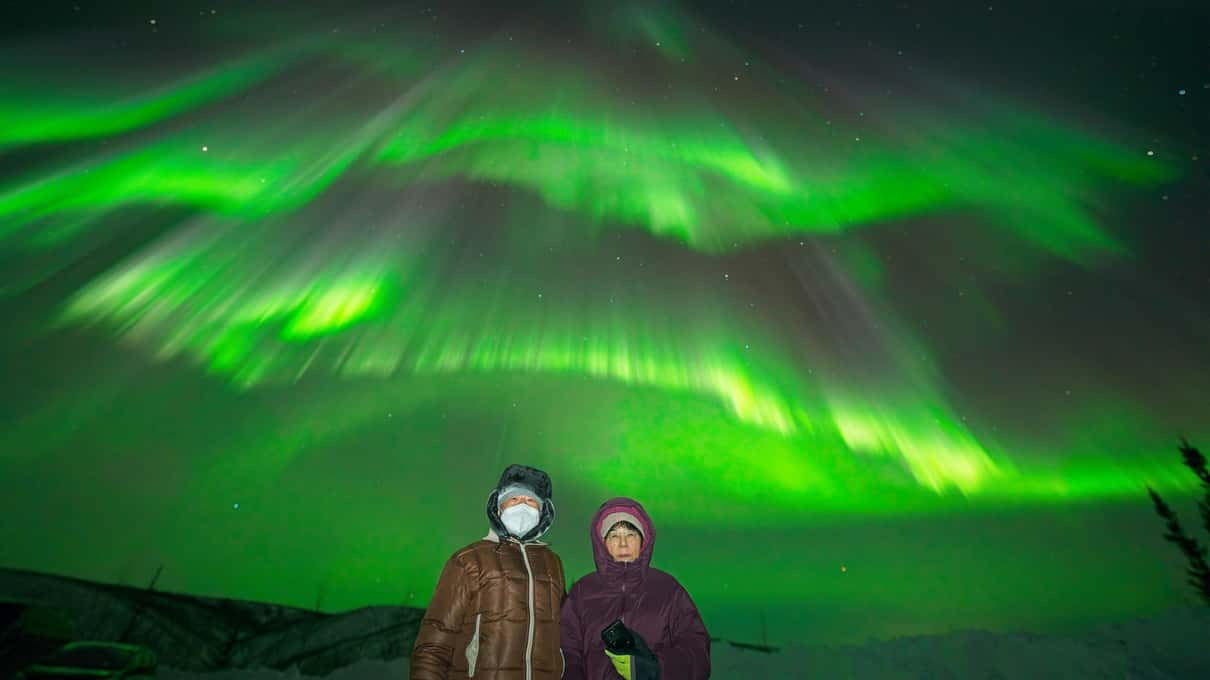
Portraits under the lights
The shot most people want is themselves under the aurora. It needs you to stand still for the whole exposure, often several seconds, while the guide lights you briefly. Pick a fixed point to look at and hold the pose until the guide says the frame is done.
Several tours do this for you. Arctic Night Tours, from ~$225, emails its guides' photos free, with as many poses as you like. Electric Moose builds the night around portraits and landscapes with a whole-sky time-lapse on top, and reviewers say that when clouds hid the sky, the owner switched to steel-wool and light-painting shots so guests still went home with pictures. SkyChase includes a selection of professional photos, while the full edited set and the originals cost extra, and one guest waited more than three weeks for theirs. The glass house guides photograph guests outside when the lights show and send the pictures the next day.
Learn the settings from a pro
Electric Moose Studios (from ~$300) keeps the group to ten, led by a professional photographer who teaches phone and camera settings on site. If your photos show no aurora, you get a free second tour within two years, subject to seats.
Which tour suits a photographer
If you want pictures without fuss, take Arctic Night Tours and spend the night looking up. The free photos cover the portraits, and the long chase gives you the most chances at a clear sky. If you want to learn to shoot it yourself, Electric Moose at ~$300 is built for that, with ten guests or fewer and lessons on the spot. SkyChase suits someone who wants a rented tripod and a warm lodge between shots.
The glass house is the weakest pick for serious shooting, because the glass picks up reflections from the room, so plan to work outside. Chase by van or wait in a cabin sets the two styles side by side. For a landscape with a sense of place, the Arctic Circle day at ~$379 makes photo stops along the Dalton Highway with six guests at most, and to the Arctic Circle and back describes the route.
Whichever you choose, look at the moon before you book. A bright moon lights the snow nicely for landscapes but drowns faint aurora, and when to see the aurora explains the darker weeks. Reading the aurora forecast helps you pick the night, and if you plan to shoot from a hilltop of your own, hunting the lights on your own covers the drive.